
Archery is a sport in which both the physicality of the shooter and the physical performance and design of the bows and its parts work in tandem to produce accurate and reproducible shots. To that end, the bow itself contains significantly more pieces than most casual observers can surmise; with each piece serving a particular function in making the shot the most accurate and reproducible. The upside to all of this is that for beginners and intermediate archers, many pieces are not essential. In the following post, we here at Trojan Archery will attempt to introduce what we consider to be the “essentials” to getting you started on your journey of archery development. For a comprehensive list of all the different things that you can attach to your bow, see our full equipment guide/recommendation. Note that the information here is not meant to be comprehensive and should be taken as a starting point; if you have access to a more experienced archer (e.g. one of our officers) consult them before making a purchase.
Before tackling the bow itself, there are a few wearable pieces that should be considered first. These pieces are rather universal and you will always want to maintain your own set. Note that if you are shooting as a part of an archery club (e.g. Trojan Archery), these pieces can be loaned out to you. Note that in most cases, competition rules forbid the use of camo-patterned equipment.
Personal Gear
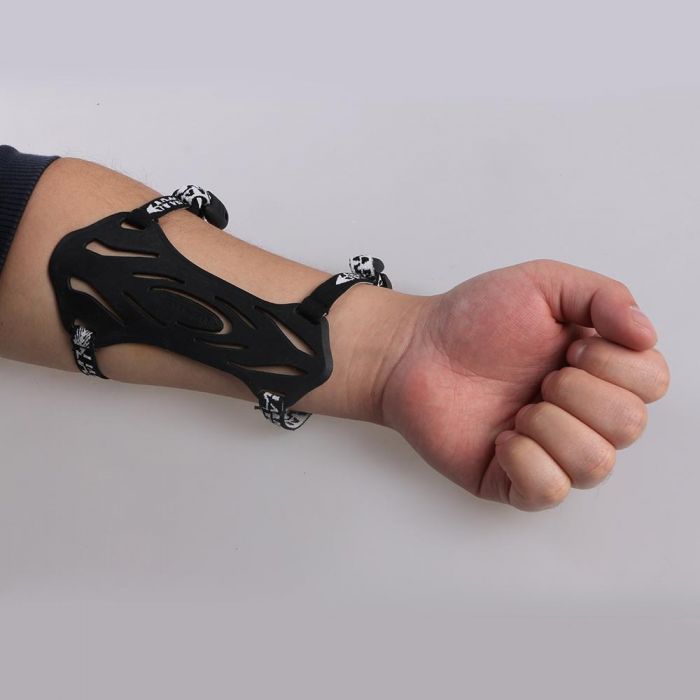
- Arm Guard: A piece of tough material ranging from plastic to leather which covers the inside of the arm holding the bow. It is intended to protect the arm against unintended contact with the bowstring during the shot.
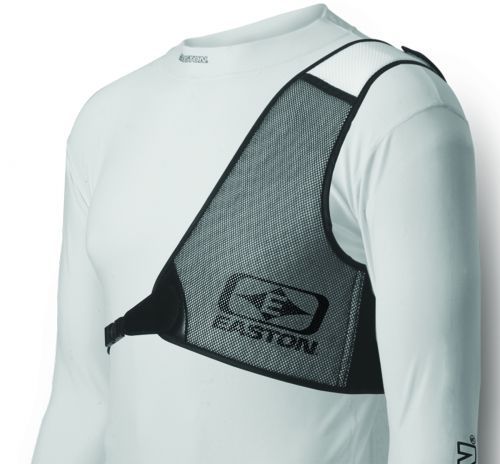
- Chest Guard: A piece of netting/covering to be worn over the chest on your bow arm’s side. Like the arm guard, it is intended to protect the covered regions from accidental contact with the bowstring mid-flight. This piece of equipment is optional, and doesn’t need to be worn unless the archer is experiencing chest discomfort.
- Finger Tab: A leather finger covering worn on the draw hand. It reduces friction and pressure between the drawing fingers and the bowstring. When first starting it may not seem too important, but at higher poundage bows, a tab is a necessity. This is the first piece of equipment we suggest new archers invest in. Compound shooters use a mechanical release aid instead of a tab.
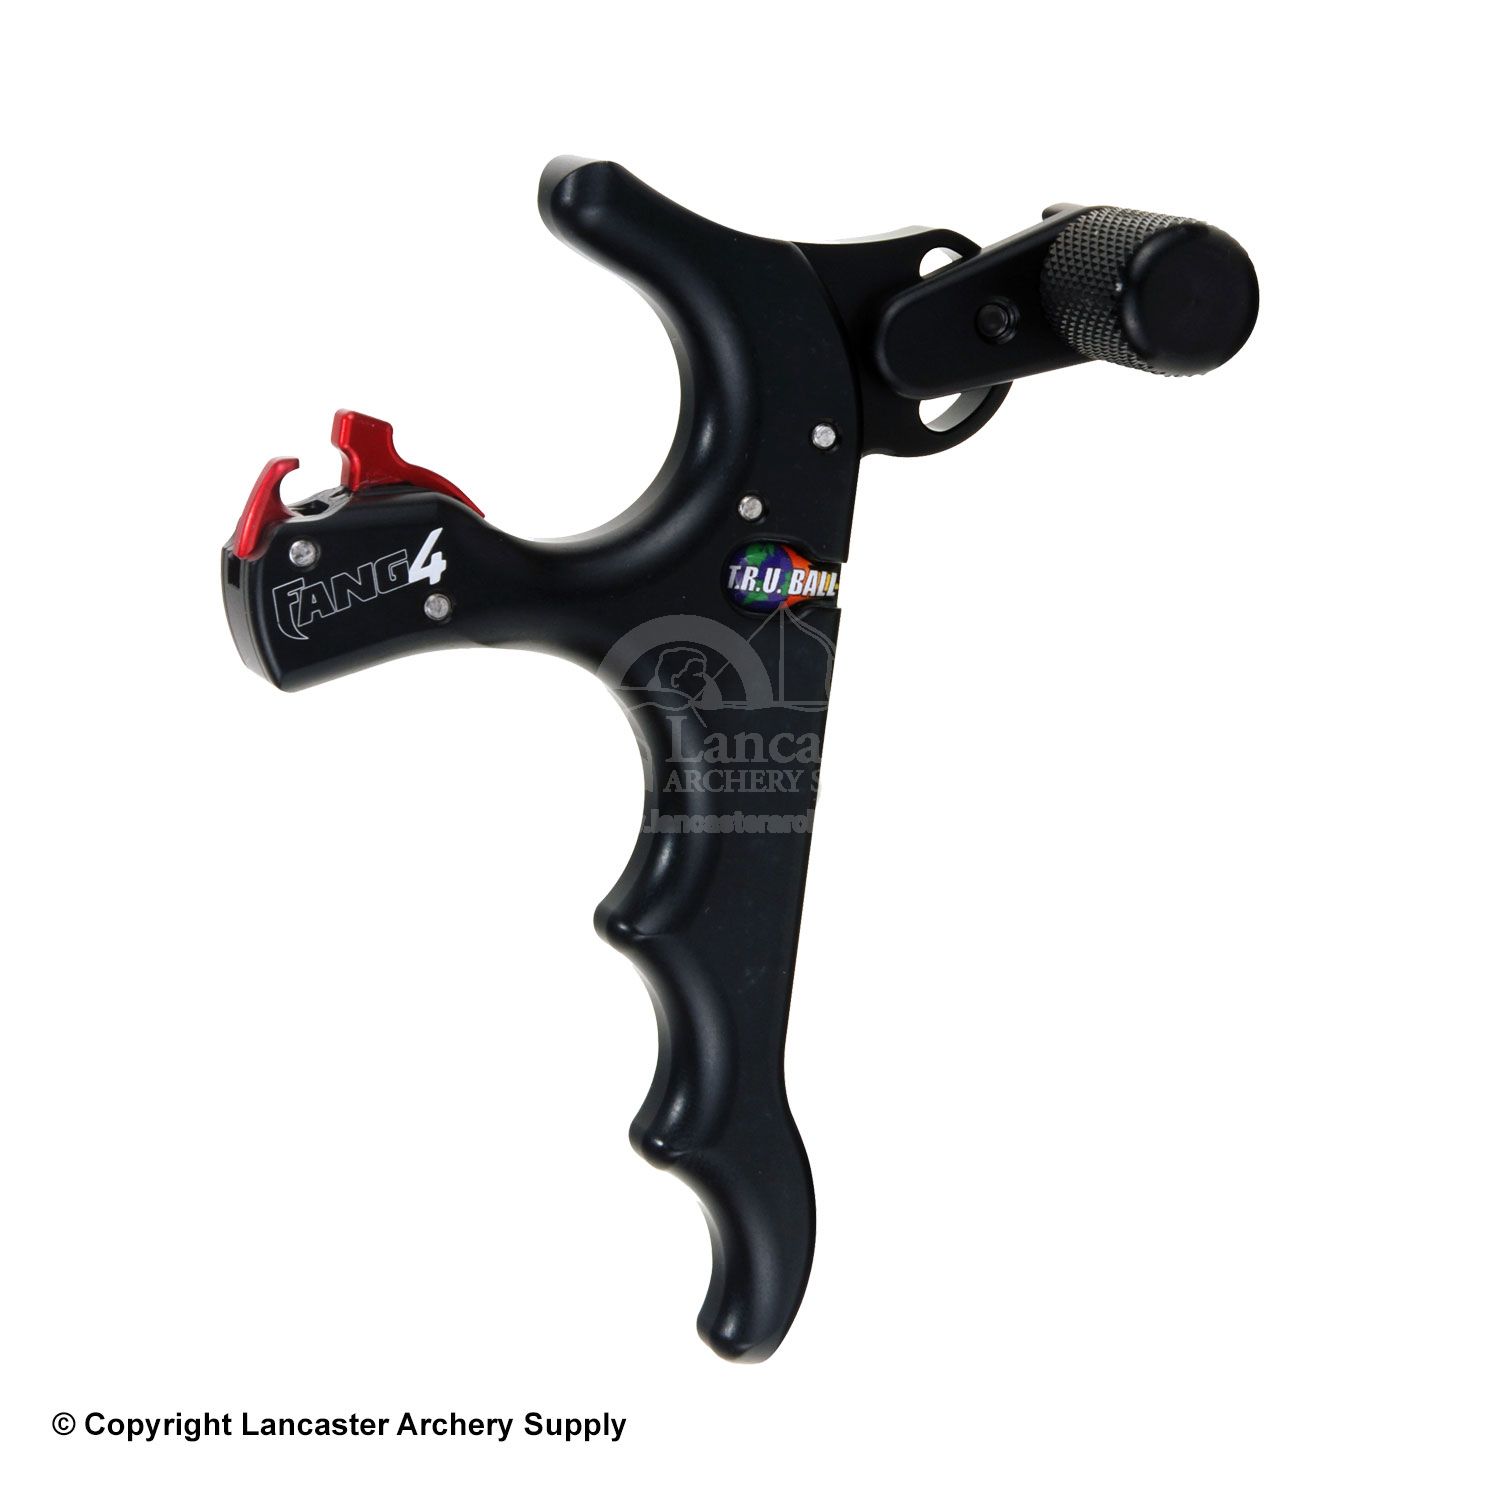
- Mechanical Release: The mechanical release is used exclusively by compound archers. The release hooks onto the string via a small loop attached at the nocking point, and is used to draw the string back comfortably and then release it accurately by activating a trigger rather than touching the string directly with the fingers.
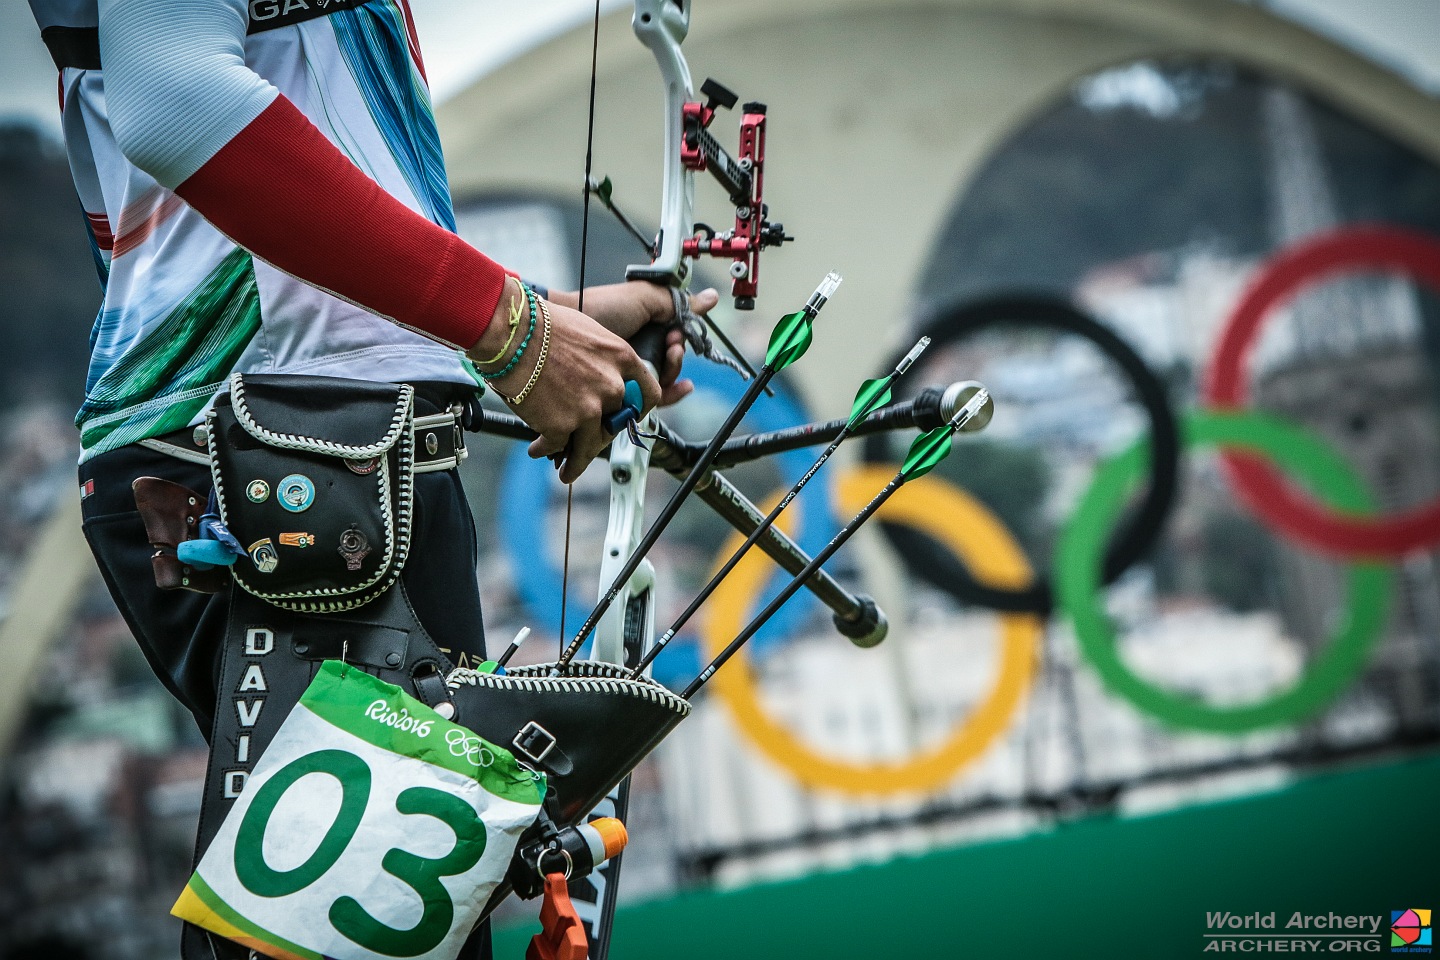
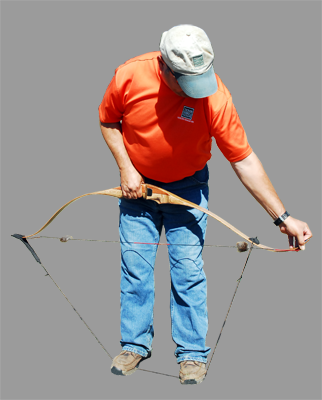
- Quiver: A tube worn on the hip used to hold your arrows which often times has pockets for other accessories. Competition rules forbid the use of back quivers, so stick to hip/field quivers. This is also one of the first pieces of recommended equipment, and will be handy for storing a tab and other gear.
- Stringer: Used to string the bow. The team has a number of them, but for archers shooting on their own, it can be helpful to own one.
- Arrows: Arrows are fairly personalized pieces of equipment that depend on your physiology, shooting form, and competition needs. Investing in them is only recommended for competing intermediate to advanced archers.

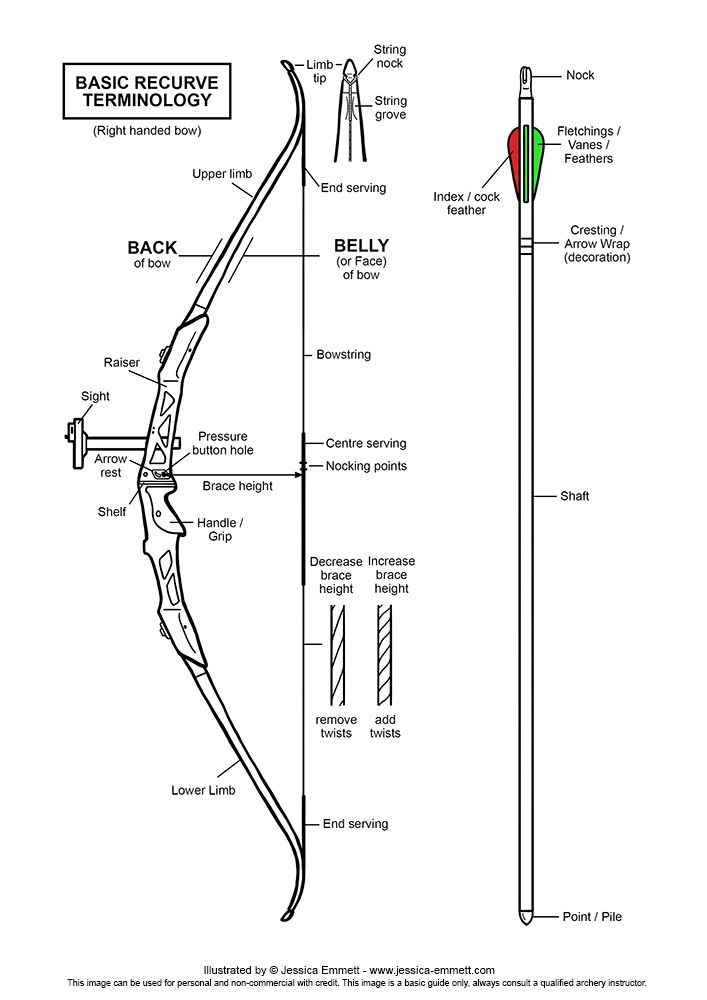
Recurve Anatomy
- Riser: The center portion of the bow usually associated with the grip of the bow. It serves as the attachment point for almost all of the other parts and accessories. Risers have a built-in handedness and are not interchangeable for left-handed and right-handed shooters.
- Limbs: The pair of arms which get drawn back and store energy during the process of shooting. They determine how much energy is imparted to the arrow as well as the drawing weight of the bow. Since most archers grow rather rapidly in draw weight at the beginning and intermediate stages, expect to change limbs rather often until you reach ~30lb draw weight for recurve. The team has a large limb library, and will lend out limbs until an archer is likely to stay at the same weight for a long time, and is ready to buy their own nicer limbs.
- String: Connects the two limbs and is drawn back to convert mechanical energy of the drawing motion into stored energy in the limbs.
- Nocking Point: A brass bead placed on the bowstring to denote where the arrow’s nock should make contact with the string for best flight.
- Arrow Rest: A small arm–usually plastic or metal–attached to the riser on which the arrows sits through the entire shooting process. This arm contacts the arrow as little as possible as to have little effect on the arrow flight.
- Plunger: A spring-loaded rod attached to the riser which is used to tune the centering of the arrow and the stiffness of the arrow in flight.
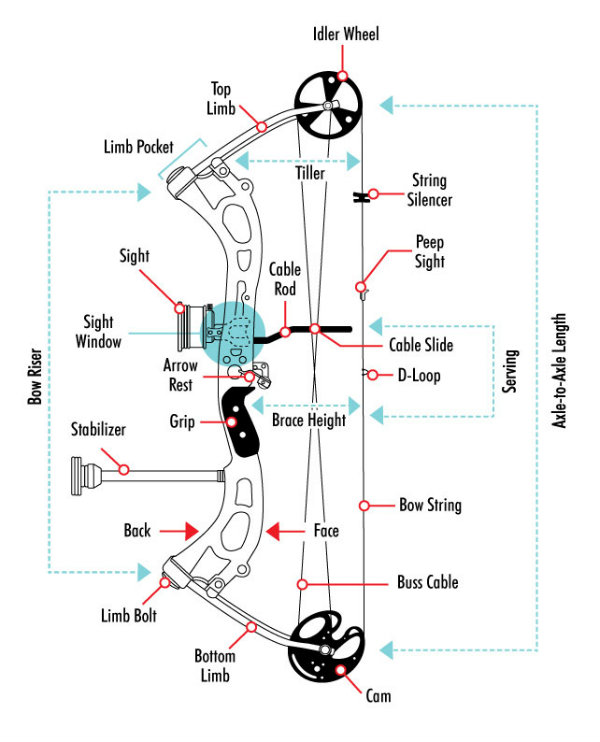
Compound Anatomy
The compound bow is much more complicated in design than the recurve, and most adjustments will need to be made in a professional shop or with professional help. Unlike recurve bows, compound bows are sold as a complete package and very few parts can be exchanged. The biggest difference is that the limbs are much shorter, and the draw of the bow is made significantly lighter at the end of the draw using “cams” at the tips of the limbs. Rather than a nocking point, a compound bow has a D-loop to which the release attaches.

One thought on “So You Want to be an Archer: Beginner’s Introduction to Gear”